How to Photograph Death Valley’s Night Sky Like a Pro
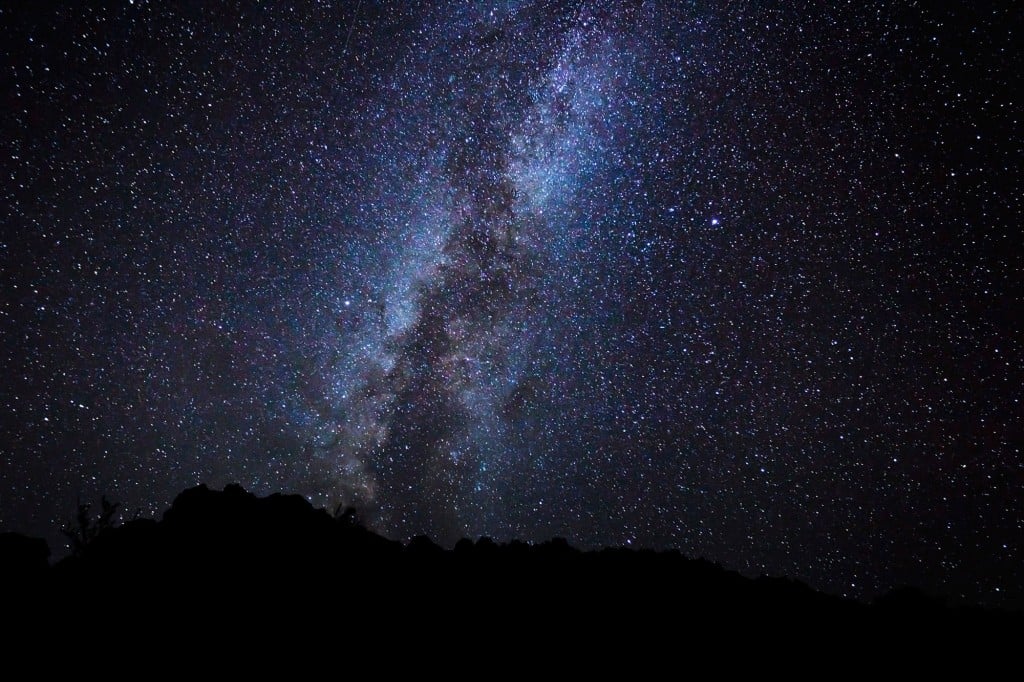
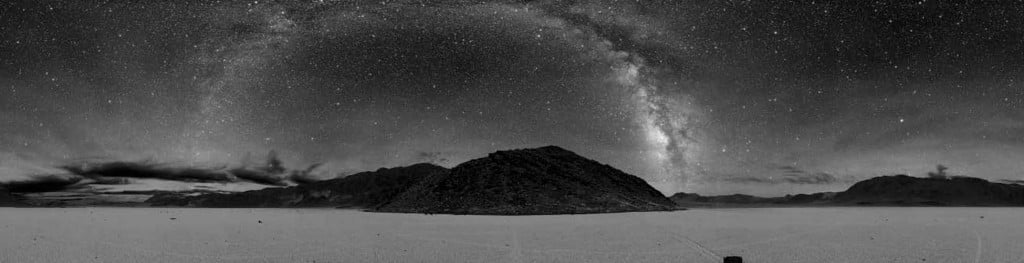
The skies at Death Valley National Park come alive at night with an increasingly rare sight in the country: a sky filled with stars. Designated the largest Dark Sky National Park in the country by the International Dark Sky Association and rated in its highest “Gold Tier” category, Death Valley boasts a black velvet nocturnal sky filled with the Milky Way arching above the vast landscape.
The park attracts photography buffs from around the world drawn by its celestial beauty. But capturing it can be a challenge. Here are some tips that will help you take home out-of-this-world photographs.
Use a Tripod
To photograph the night sky you need to use a long shutter speed, meaning your camera or phone sensor will be exposed to faint starlight for a long time in order to record the stars. A tripod will keep your sensor still while it records light. You don’t need a large or expensive tripod, just one that can support the weight of your camera and withstand whatever breeze there may be. Even small tabletop tripods will work. If your tripod is jittery at all, fill a bag with rocks and hang it from the tripod, and don’t fully extend it to keep its center of gravity lower to the ground. Using a cell phone? Adapters with a ¼-20 thread are available to clamp your phone to any standard tripod. Finally, glow-in-the-dark tape is useful for marking tripod legs and lens caps that might get bumped or dropped.
Choose Your Lens
A wide-angle lens of at least 28mm (full-frame; 14mm for APS-C cameras) is a good choice for capturing the expanse of the Milky Way, and anything in the 15mm to 24mm range is ideal. Most cell phone lenses are equivalent to 28mm. Longer lenses such as a 70-200mm are good for revealing astronomical objects such as nebulae and star clusters, but they magnify the blurring caused by the rotation of the earth and any camera shake.
Manage Your Settings
For cameras that allow manual control, begin by setting your ISO (light sensitivity) to 800, open your lens aperture (f-stop) to as wide as it can go (the smaller the number the larger the aperture), and set your shutter speed to 20 seconds (hence the tripod). If the shot looks too dark, increase your ISO to 1600, then 3200. You can also slow down your shutter speed, but keep in mind that anything longer than 30 seconds will start to show blurring due to the earth’s rotation, especially with longer lenses such as 50mm and above. Higher ISOs also invite digital noise and potential “hot pixels,” which are discolored by pushing the sensitivity too high. Lenses that allow apertures of 1.8 or 2.8 are preferable to those that start at 4 or 5.6 as your shutter speed can be longer and ISO can be lower, but those lenses also tend to be more expensive. Play around with these three settings (aperture, shutter speed, and ISO) until you get a satisfactory exposure.
Use a remote control if you have one and/or set your drive mode to 2- or 10-second self-timer mode, and use the mirror-up setting if your camera has one. This way the slight jiggle of depressing the shutter button will have time to settle down so you get sharper images.
For cell phones, try apps such as Camera FV-5 (Android), Open Camera or DSLR HD Camera that give you some control of the camera settings including ISO and shutter speed.
Check Your Focus
Autofocus lenses often will not be able to focus on the sky, so you’ll need to switch to manual focus. Typically, turning the lens until it stops at the infinity setting will render stars in focus, but some lenses can actually be out of focus when turned all the way. Take a shot, then magnify the image to make sure that your stars are pinpoints and not fuzzy dots. Most cameras allow magnified live view, so you can zoom in and nail your focus before taking the image. Use a red-filtered flashlight so you can see what you’re doing without ruining your natural night vision with white light.
Location, Location, Location
Including a bit of landscape will add depth to your photos and make your Milky Way shots less generic. Plan where you want to shoot before hand, and know how to get there and back safely in the dark. Without any artificial lighting, the landscape will mostly appear as silhouettes, but that will still add an interesting dimension to your photos. The Mesquite Flat Sand Dunes, Badwater Basin, Zabriskie Point, Dante’s View, and Rhyolite Ghost Town all make for interesting foregrounds.
Try Light Painting
If you’d like to add some detail to the landscapes, try light painting with a flashlight or off-camera flash. Using the self-timer or remote, trip the shutter and sweep the flashlight slowly and steadily across the landscape during the long exposure to reveal some detail. You won’t appear in the photo if you walk in front of the camera as long as you don’t stand still. If you’d like a person in the photo, have that individual stay completely still for the exposure while you move the light over them. Off-camera flashes can be fired with the test button. Aim at different features and pop the flash as many times as you can during the long exposure. Make sure there are no other people around, especially when using a flash, so you don’t ruin their shots or night vision. And always be careful when walking in the desert, especially at night.
Plan for the Moon and for Meteor Showers
Know what the moon will be doing during your visit. If you want a completely dark sky for Milky Way shots, plan your trip as close to the new moon as possible. If you’d like to take ghostly landscape shots, a gibbous to full moon will act as a huge flashlight for light painting. Sky Map, LightTrac and moon phase apps are helpful for planning your trip. Don’t have a choice when you visit? Use an app to plan when a bright moon will set or rise at night. If you’d like to photograph the moon, the two days before it’s completely full allow you to shoot it while the landscape still has some sunlight. On the night of the full moon, the sun will have already set by the time it rises.
Large and small meteor showers occur throughout the year. Find out from which constellation meteor showers will appear to originate, and point your camera there for a radiant effect.
Go By Car
When staying at the AAA Four Diamond Inn at Death Valley or the family-friendly Ranch at Death Valley, a short walk will lead to dark, open skies. If you’d like to venture farther out by car, plan exactly where you’re going and let someone know. The landscape can look completely different at night, and something that seems easy to reach during the day can be far more difficult in the dark. One wayward rock can render your vehicle inoperable. Always take a real compass and map in addition to any GPS devices you’re using, and take water and other emergency items. If your vehicle can’t make the trip, you can rent a jeep from Farabee Jeep Rentals & Tours across the street from The Inn.
Participate in Special Events
Death Valley National Park offers astronomy programs in conjunction with local astronomy clubs. Stargazing parties take place throughout the year, and these are great opportunities to learn more about astronomy and astrophotography from experts. The next star party will be Jan. 27-28, 2017. Check the Calendar of Events on the Activities tab of the website for other events and the new and full moon phases.
Finally, don’t forget to stop fiddling with your camera for a moment to let yourself be star struck by Death Valley’s pristine night sky. It’s worth the stay alone at one of the most spectacular places on earth.
For travel experiences available from Xanterra Travel Collection® and its affiliated properties, visit xanterra.com/stories.
Written by: Steve Larese
Steve Larese is a travel journalist and photographer based in New Mexico. He specializes in writing about and photographing America’s national parks. See more at stevelarese.com.